By Susan Hershberger
Introduction
Some plastic food containers and lids can take the heat. They come out of the dishwasher clean and ready for the next use. Other kinds of plastic containers bend or shrink when they get too hot. That makes them not-so-reusable as food containers. Let’s see if we can find another way to reuse these types of plastics, in a way that is fun and interesting!
Materials
- “Clamshell” plastic packaging marked with recycle code #6 or “PS” (polystyrene), or commercial “Shrinky Dinks”
- Permanent markers
- Scissors
- Aluminum foil
- Metal tray or cookie sheet
- Oven mitt
- Spatula
- Oven or toaster oven able to heat to 325–350 °F (about 165–175 °C)
- Graph paper
- Optional: Sandpaper, colored pencils, hole punch, string
Safety Suggestions
- Safety glasses suggested
- Caution: hot materials!
- Thoroughly wash hands after this activity
- Work with an adult. This activity involves heating polystyrene plastic in a HOT regular oven or toaster oven.
Procedure
- Look for the triangle-shaped recycle symbol on your plastic item. The number 6 and letters PS mean that the plastic item is made of polystyrene, which is the type of plastic that works for this activity. IMPORTANT: other types of plastic will not work for this activity, and may be dangerous.
- Cut the side off the plastic clamshell, leaving a flat area to draw a favorite design. Be careful: the edges of the cut plastic may be sharp.
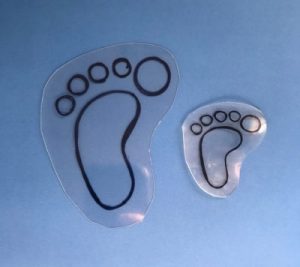
- Draw an outline of a shoe footprint on the plastic using permanent markers. Make it 3-4" (about 7.5–10 cm) long.
- Cut around your footprint design. If you’d like to hang your design later, use a hole punch to make a hole near the edge of the plastic. Make the hole large, as it will shrink as well.
- Place your footprint design on the graph paper grid and count the number of squares covered by the plastic. Just count the squares that are totally covered. Record the number of squares. Notice the thickness of the plastic. Estimate: how many pieces of paper thick is it?
- Cover the surface of your cookie sheet with aluminum foil. The aluminum foil protects your cookie sheet from the permanent marker. Place your footprint design marker-side-up to prevent sticking.
- Have your adult partner use an oven mitt to put the tray into an oven preheated to 325–350 °F for 2–5 minutes, or until the plastic stops shrinking.
- If the oven has a window, watch the shrinking process. The plastic will curl and then flatten.
- Have your adult partner use an oven mitt to remove the tray from the oven (both are very hot!). If the plastic needs help getting flat, press it with a spatula while still hot. Then use the spatula to move the plastic to a flat surface, such as a piece of paper on a countertop. Allow the plastic to cool completely.
- Once it’s cool enough to touch safely, place your footprint design on the graph paper grid. How many squares does your plastic cover now? Record the number of squares. How much did your plastic shrink? What happened to the thickness of the plastic film?
What did you observe?
What do you observe about the number of squares the plastic covers and the thickness of plastic before and after heating? Download and print this worksheet to record your observations.
How does it work?
Polystyrene and other plastic polymers are very big molecules that are made up of thousands of carbon and hydrogen atoms arranged in long chains. Certain polymers have special properties, like very high melting points. This is because the large number of atoms and the long shape of the molecules make it difficult for polymers to melt or evaporate when heated.
Some polymers soften and can be stretched when heated. The plastic food container you used was made by heating and stretching plastic into a mold. Once cooled, it kept that stretched shape. When you heated the plastic in the oven, it returned to its original, unstretched shape. Stretching the plastic means less plastic is used to make plastic food containers. Over all, this process is good for the environment because it uses less carbon. However, recycling programs in many locations do not recycle #6 plastic.
You might think that you reduced the amount of plastic by shrinking your footprint. But actually, you did not. The amount of matter stayed the same, and you only changed the size of the plastic. It is even better if you reuse the plastic to design something useful, because otherwise, it might simply be trash. Think of other shrinking designs you could make that could be useful. Maybe you could design crafts like holiday ornaments, keychains, or zipper pulls!
For more fun, you can sand one side of the surface of another piece of plastic and draw on the rough plastic film with colored pencils. Making decorative and useful items from waste is a fun way to reduce your environmental footprint!
Susan Hershberger, Ph.D. is Director of the Center for Chemistry Education at Miami University in Oxford, Ohio.


;void(0);)