Lesson Overview for Teachers
View the video below to see what you and your students will do in this lesson.
Downloadables:
Lesson Plan (PDF) | Teacher Background (PDF) | Connections to NGSS (PDF)
Objective
Students will be able to explain that wind is air that is moving and that air is made up of tiny particles called molecules. Students will also be able to explain that when wind blows, it is the molecules hitting objects that makes the objects move.
Key Concepts
- Wind is air that is moving.
- Air is made out of tiny particles called molecules that we cannot see.
- Wind makes objects move because the molecules in air hit the objects and move them.
NGSS Alignment
- K-ESS2-1: Use and share observations of local weather conditions to describe patterns overtime.
The activities in this lesson focus on what causes wind and how wind makes things move.
Summary
- The class has a short discussion about air and wind and are introduced to the idea that air is made of tiny particles that we cannot see and that wind is moving air.
- Students see an animation showing what causes wind and why wind makes objects move.
- Students do an activity showing that a heavy strong base can make things more stable in the wind.
Evaluation
There is no formal student activity sheet or assessment for this lesson. To evaluate student understanding, use your usual methods of interacting with students, asking questions, and discussing ideas with students as they participate in the different parts of the lesson.
Safety
No special safety precautions are necessary.
Materials
- Construction paper
- Scissors
- Tape
- 8 pennies
- Magazine
Teacher Preparation
- Cut out strips of construction paper that are about 4 inches long and ½ inch wide. Prepare enough so that each student receives one strip.
Engage
1. Show a video about wind and discuss with students what they see, hear, and feel when it’s windy outside.
Show the video Wind.
Ask students:
- Who has been outside on a windy day?
- What did you see or hear?
- How did it feel?
Show students wind illustrations.
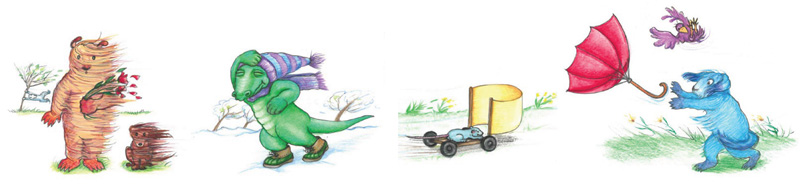
Ask students:
- What is wind moving in each picture?
Fur, hat and scarf and making it hard to walk, a little sail cart, an umbrella and a bird - What do you think wind is made of?
Wind is air that is moving.
Explore
Question to investigate: What is wind and how does it make things move?
2. Have students use their breath as a model for wind.
Materials
- Construction paper strips (4 inches long and ½ inch wide)
Procedure
- Have students hold the paper strip as shown. Ask studentsto blow gently on the strip of paper.
Tell students that the moving air from their mouths is like wind.
- Have students blow breaths of slow and fast moving air.
Tell students that the air from their breath and the air around them is made of molecules that are so small we can’t see them. Those molecules hit against the paper and make it move.
Explain
3. Show an animation to help explain that air is made of molecules and that wind is moving air.
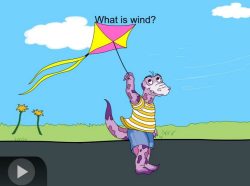
Show the Animation Wind.
Explain to students that the wind is just air that is moving. Explain that air is actually made of extremely tiny particles called molecules that we can’t see. Explain to students that when they see leaves, a flag, or their hair moving in the wind, it’s these tiny molecules that are making it happen.
Extend
4. Have students investigate a way to keep a structure from falling down inthe wind.
Question to investigate: Can buildings be made so they move less in the wind?
Tell students that some buildings can be damaged or even knocked down in very strongwinds, like a hurricane or tornado. There are certain ways to make buildings more sturdy in strong winds.
Tell students that they will investigate how to keep a building from falling down in a strong wind.

Materials for each group
- Construction paper (one sheet per pair of students)
- Tape
- 8 pennies
- Magazine
Note: You may need to help students with the folding and taping to make their buildings. Have students work in pairs.
- Fold the construction paper in half lengthwise as shown.
- Open the paper and fold one side so the edge meets the middle crease. Now fold the other side so that this edge also meets the middle crease.
- Stand the paper up and form it into a tall structure as shown. Use three pieces of tape to tape the edges together so that it can stand up on a desk or table. This is a model of a building.
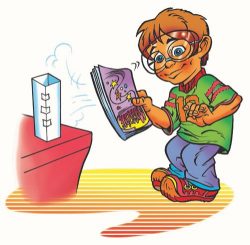
- Stand a few feet away from your building and wave a magazine to create wind to see if you can blow your building down.
If you can’t blow it down, move closer to the building or wave the magazine harder to make the wind stronger.
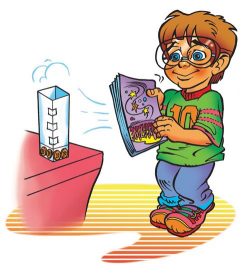
After you blow the building over, test if you can make the building stand up better in the wind by adding weight to the base. - Tape 2 pennies to the bottom of each side of the building as shown.
- Stand your building up and wave the magazine the same way you did before. Does your building stand up better or does it fall down like it did without the pennies?
5. Explain that a very heavy strong base makes a building harder to blow over in the wind.
The heavier the base of the building is, the better it is able to stand up to wind. Most buildings are actually dug deep into the ground so they have a very heavy base.
Recommended Books
The following books make excellent “read alouds” to accompany this lesson about wind. When you choose to read any of the books in the lesson is up to your own personal preference.
- The Wind Blew by Pat Hutchins
- Like a Windy Day by Frank Asch
- Feel the Wind by Arthur Dorros
- Wind by Marion Dane Bauer


;void(0);)