Lesson Overview for Teachers
View the video below to see what you and your students will do in this lesson.
Downloadables:
Lesson Plan (PDF) | Teacher Background (PDF) | Connections to NGSS (PDF)
Objective
Students will be able to explain that puddles dry up because tiny particles of water (water molecules) break away from the puddle and go into the air. Students will be able to explain that the water from the puddle that went into the air can become part of a cloud and come back down as rain and make a new puddle. This process is known as the water cycle.
Key Concepts
- When a puddle dries up, tiny particles of water break away from the liquid in the puddle and go into the air.
- The tiny water particles are called water molecules.
- Water on the ground goes into the air, becomes part of a cloud, and comes back down to Earth as rain.
NGSS Alignment
- K-ESS2-1: Use and share observations of local weather conditions to describe patterns overtime.
The activities in this lesson focus on what makes a puddle dry up after it rains. Students make the connection and see the pattern of the warming effect of the sun causing puddles to dry up faster.
Summary
- Students watch a video of a puddle drying up and have a class discussion about where they think the water goes when it seems to disappear.
- Students investigate a one-drop “puddle” in the palm of their hand.
- Students see an animation of water evaporating from a puddle and forming water droplets in a cloud.
- Students then compare a water drop evaporating from the palm of their hand to one evaporating from the surface of a desk or table.
Evaluation
There is no formal student activity sheet or assessment for this lesson. To evaluate student understanding, use your usual methods of interacting with students, asking questions, and discussing ideas with students as they participate in the different parts of the lesson.
Safety
No special safety precautions are necessary.
Materials
- Small clear plastic cup with 1 teaspoon of water
- Dropper
Engage
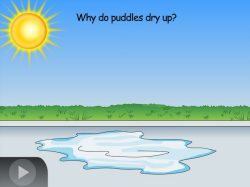
1. Show a video of a puddle drying up and discuss with students their ideas about where they think the water goes.
Show video Puddle Drying Up.
Ask students:
- Have you ever noticed how puddles eventually dry up after it rains? If the water is on the street or the sidewalk, and it can’t go into the ground, where do you think the water goes?
Explain that the water goes up into the air and gets mixed into the rest of the air. If the puddle is on dirt or grass, some of the water goes into the ground but some also goes into the air.
2. Show illustrations and lead a discussion about where students have seen water dry up.
Show pictures and discuss examples of water drying up from different surfaces.

Ask students:
- When our furry friend gets out of the pool, what different things are wet?
The ground, his fur, the towel, and his bathing suit are wet. - Do you think they get dry? If so, how?
They get dry by the water going into the air.
Explore
3. Have students put a one-drop “puddle” of water on their hand and investigate it.
Question to investigate: How fast can a tiny puddle dry up?

Materials
- Small clear plastic cup with 1 teaspoon of water
- Dropper
Procedure
- Have students use a dropper to put 1 drop of water in the middle of their hand.
Tell students that the drop of water in their hand is like a very small puddle, and that the water will be heated by their hand. Real puddles can get heated from the warm ground below them and also from the sun above them.
Ask students:
- Do you think the puddle will dry out faster if we spread the drop out or leave it in a drop?
Spread it out.
- Have students use the index finger from their other hand to spread out the water in a large area on the palm of their hand.
Expected results
The water should evaporate in about 1-2 minutes.
Explain
4. Show an animation to help explain what happens to water when a puddle dries up.
Show the animation Puddles.
Point out that when the water is warmed, tiny particles of water break away from the puddle and go into the air. Explain that these particles are called water molecules and are so small that we can’t see them.
Up in the sky, the water molecules cool down and join together to make tiny drops of water that form a cloud.
Note: The term “water molecule” is used to give Kindergarten students exposure to the term and to the idea that a water molecule is a very small particle that makes up water. No detailed understanding of the structure of the molecule or the process of evaporation is expected.
Extend
5. Compare a puddle drying in the palm of a student’s hand to a puddle drying on a desk.
Materials
- Small clear plastic cup with 1 teaspoon of water
- Dropper
Procedure
- Have students place 1 drop of water on their desk and 1 drop of water in the palm of their hand.
- Have students use a finger from their other hand to spread out the water in a larger area on their hand, and to spread out the water in a similarly larger area on the desk.
- Have students observe the water on their palm and desk for about one minute to observe whether one puddle dries faster than the other.
- If the students’ hand and desk are both still wet, have students spread the water out again and observe.
Ask students:
- Does the water on your hand or on your desk seem to be drying faster?
The water on the hand. - Why do you think water on your hand dries faster than water on the desk?
The hand is warmer than the desk and heat makes water dry up faster.


;void(0);)