ACS PRF Salesforce Application Help
Application Submission Key Steps
After a successful logon, registered users will be redirected to the PRF Portal Home Page as shown in Figure 1. The menu bar at the top of all screens provides quick access to the home screen (house icon, Figure 1, Item #1), organization, contacts, eligibility quizzes, applications, and grant requirements. To start the submission process (i.e., create an application), you must create an Eligibility Quiz for the grant, fellowship, or award by accessing this menu option (Figure 1, Item #4). Once an application is created, it can be accessed using the {Applications} menu option (Figure 1, Item #5). There are separate information tabs for grants (e.g., Petroleum Research Fund), fellowships (e.g., Sigal Fellowship), and awards (e.g., Sustainability) (Figure 1, Item #2). Within a tab, there are links to useful information such as application instructions and eligibility (Figure 1, Items #6). For PRF grants, a link to Safety Requirements is also available (Figure 1, Item #7). The registered contact name is shown on the upper right side of the Portal Home screen (Figure 1, Item #8).
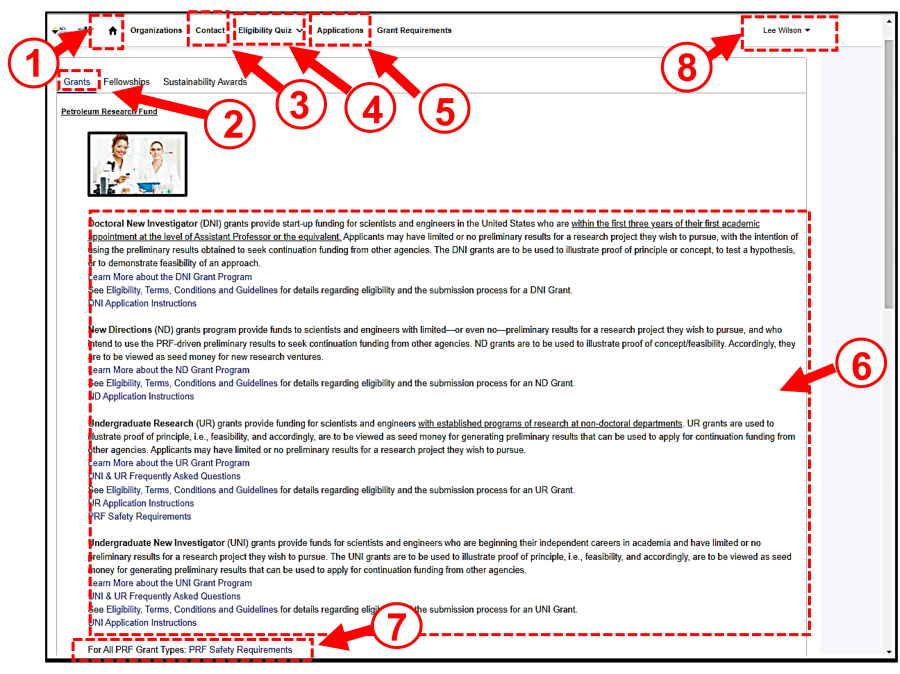
Figure 1. PRF Portal Home Screen
After selecting the {Eligibility Quiz} menu option (Figure 2, Item #1) and suboption (e.g., PRF), available quizzes will be displayed. Click on appropriate Quiz type to start the eligibilty qualification process (Figure 2, Item #2). There are links to Useful Information for the particular quiz type on the right side of the screen (Figure 2, Items #3). Deadlines for the Submission Window are shown in the upper right corner (Figure 2, Items #4); all deadlines are Eastern Standard Time (EST).
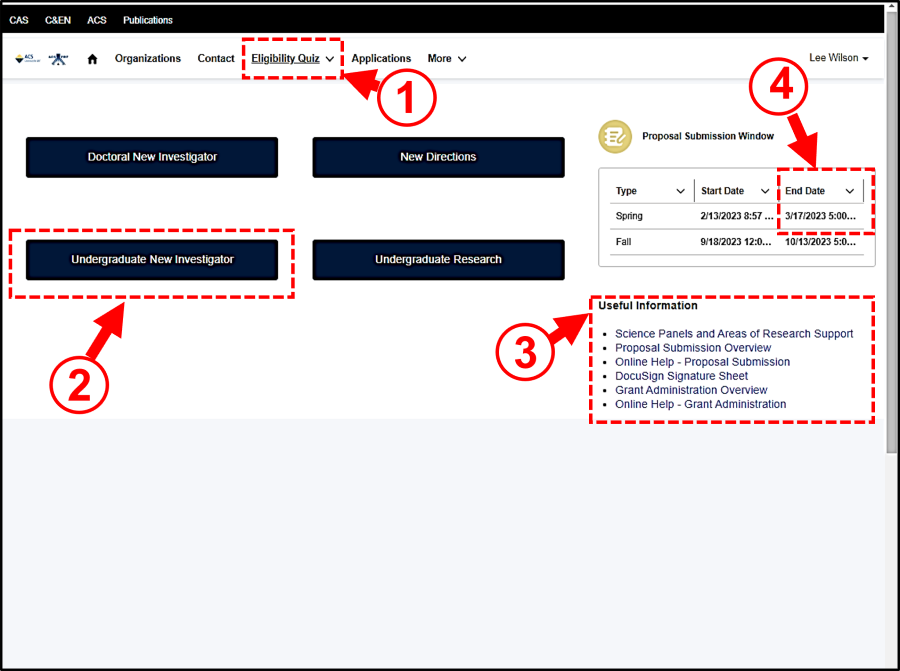
Figure 2. PRF Portal Eligibility Quiz Screen
The My Quiz list view is shown in Figure 3 and is accessed by selecting the {My Quiz} suboption (Figure 3, Item #2) . New Quizzes can be created using the appropriate suboption on Eligibility Quiz menu option (Figure 3, Item #1). Created quizzes will be accessible by clicking on the hyperlink on the list view (Figure 3, Item #3).
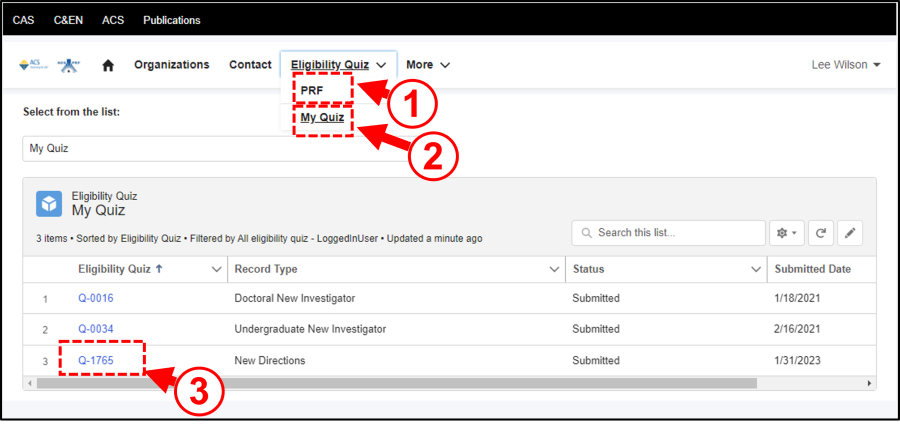
Figure 3. PRF Application Portal My Quiz Screen
1. Create the Eligibility Quiz:
After selecting the appropriate type (Figure 2, Item #2), the quiz form will be displayed as shown in Figure 4. Provide answers to each question by clicking on the pull-down below the question (Figure 4, Item #2). If there are hyperlinks (Figure 4, Item #1), you should access and review the content. Use the slider bar on the right side of the form (Figure 4, Item #3) to scroll through the questions. After answering all of the questions click the [Save] button (Figure 4, Item #4).
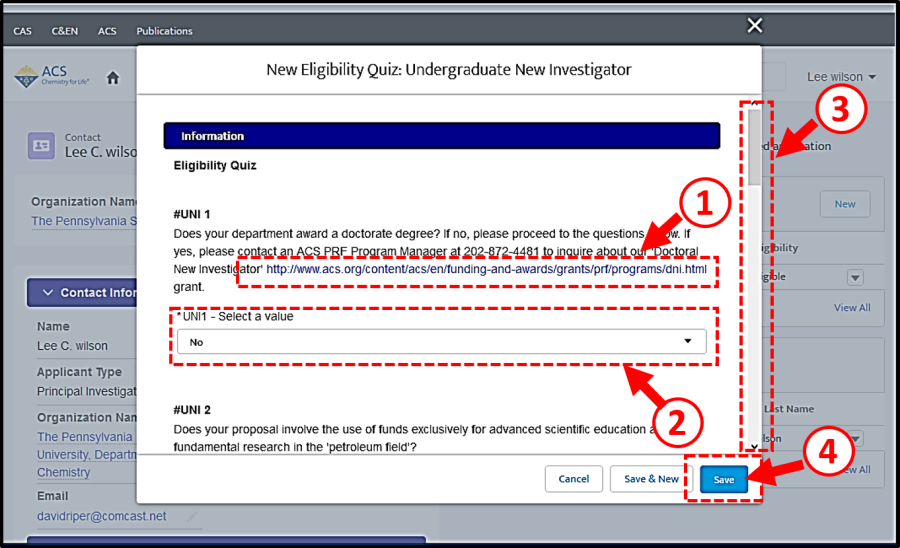
Figure 4. PRF Eligibility Quiz Form
2. Create the Application:
Applications can only be created from within a successful Eligibility Quiz record for a given program type. Click on the [Create Application] from within the Eligible Quiz record (Figure 5, Item #3) to create respective grant application. When a Quiz record is created, it is assigned an ID (e.g., Q-0014) and is accessible from the My Quiz list view.
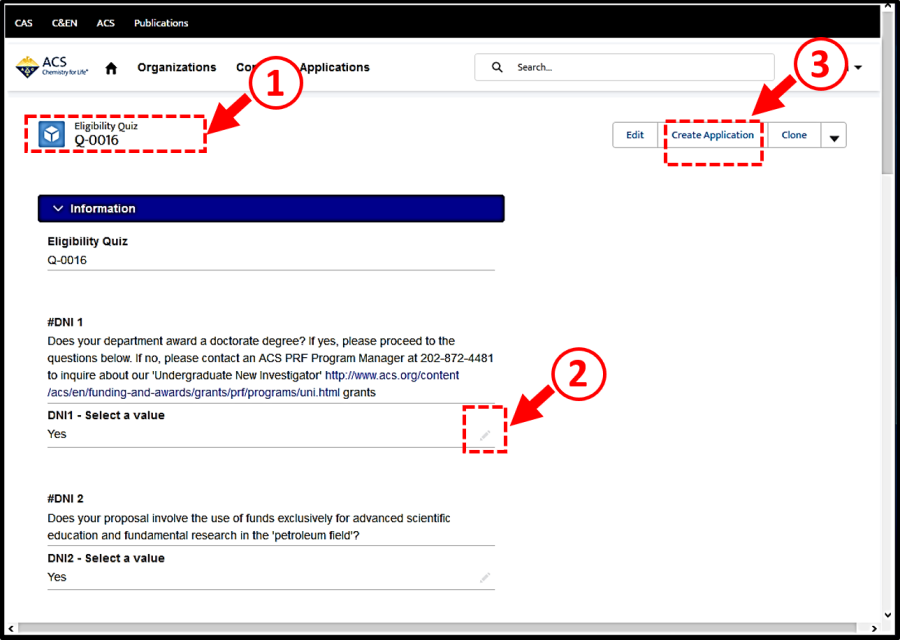
Figure 5. PRF Eligibility Quiz Form - Creating the Application
3. Application Entry, Validation, and Electronic Signature:
After an application is created it can be accessed by selecting {Applications} from the menu bar at the top of the screen. Once an application is created it is assigned a unique ID (e.g., 66899) which is located in the upper left side of application detail screen (Figure 6, Item #1). Please include this ID in your email if you need assistance in completing the application from PRFSupport@acs.org. Sections on the application form can collapsed or expanded by clicking on the ">" or "\/" in the section header, respectively. The system will retain the most recent expand or collapsed setting. To enhance workflow, it is recommended that you collapse a section after completing it. There are buttons (e.g., [Add Suggested Reviewers]) and a pull-down menu to perform specific operations on the application form (Figure 6, Item #2). There is a separate section at the bottom of the application detail screen for budget entry. Use the [New] button on the Budget Section header to create budget years. Use the {View Budget} option from the pull-down menu to view and print a budget summary (Figure 6, Item #3). You must validate the application (Figure 6, Item #5), initiate the DocuSign transmission (Figure 6, Item#4) before submitting the application (Figure 6, Item #6). Warning: The DocuSign Signature Package is generated using information (e.g., budget, institutional endorser, etc.) that has been entered into the application form. If you update information after generating the Signature Package it may not be valid. The DocuSign Signature Package should not be initiated until all application information is entered, reviewed, and validated. The DocuSign Transmission Status is displayed at the top of application detail screen (Figure 6, Item #7).
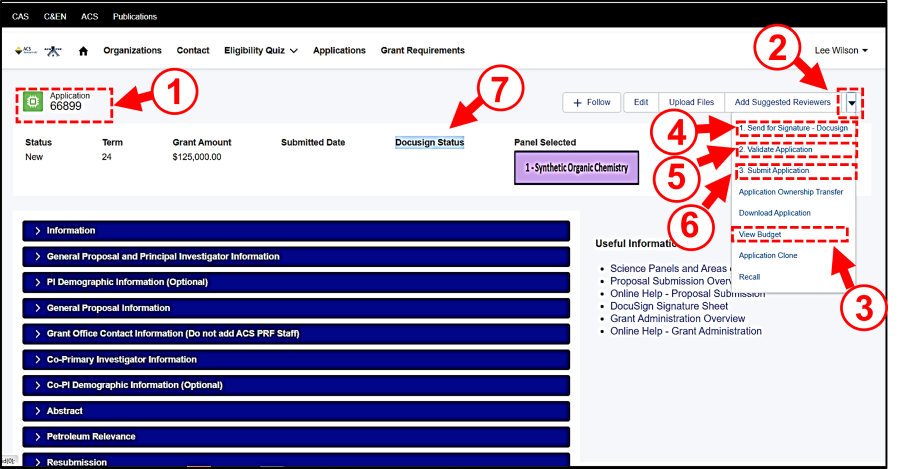
Figure 6. PRF Application Detail Screen
4. Submit the Application:
After uploading all documents, completing the signing of the DocuSign Package, and performing the validation, you must select the {Submit Application} from the pull-down menu (Figure 6, Item #6) prior to the deadline in order for your proposal to be received by PRF. Should you need to make corrections to your proposal prior to the deadline, you can perform a {Recall}. You will receive a confirmation email after submitting.