Molecules Matter
Lesson Summary Video for teachers
Note: This video is designed to help the teacher better understand the lesson and is NOT intended to be shown to students. It includes observations and conclusions that students are meant to make on their own.
Key Concepts
- Chemistry is the study of matter.
- Matter is made up of extremely tiny particles called atoms and molecules.
- Atoms and molecules make up the three common states of matter on Earth—solids, liquids, and gases.
- The particles of a liquid are attracted to one another, are in motion, and can move past one another.
- Being a solid, liquid, or gas is a property of a substance.
Summary
Students discuss the meaning of “chemistry” and “matter.” Students investigate a drop of water hanging from a dropper and drops of water beading up on wax paper. They also look at a molecular animation that models the motion of water molecules. Students are introduced to the idea that matter is made up of extremely tiny particles that are attracted to one another.
Objective
Students will describe their observations about water on the molecular level using the idea that water is composed of tiny molecules that are attracted to one another.
Safety
Be sure you and the students wear properly fitting goggles.
Materials for Each Group
- Water in small cup
- Dropper
- 2 popsicle sticks
- Wax paper
- 2 large index cards (5 × 8”)
- Tape
Materials for the Demonstration
- Tall, clear plastic cup
- Water (room temperature)
- White sheet of paper
- Food coloring (red, blue, or green)
About this Lesson
You may be able to complete this lesson in less than 1 class period. If you think this will be the case, you can move on to Lesson 2, which is an application of the concepts covered in Lesson 1.
Note: Some solids, liquids, and gases are made of atoms, and some are made of molecules. Since the concepts covered in Chapter 1 apply to both atoms and molecules, the term “particle” is used as a generic term to include both. At this point, it is enough to give students simple working definitions of “atom” and “molecule.” You can tell students that an atom is the smallest building block of matter and that a molecule is two or more atoms connected together. Let students know that even though atoms and molecules are different, in Chapters 1 and 2, they will both be represented by circles or spheres. Chapter 3 and 4 will go into more depth about the structure of atoms and molecules and will use more detailed models to represent them.
Download All Lesson 1.1 Resources
Get the entire lesson plan and Student Activity Sheet for "Lesson 1.1: Molecules Matter."
Online Assignments
Supplement in-class learning with interactive, multimedia-rich Google Forms lesson modules, perfect for reinforcing key chemistry concepts and scientific investigation skills.
Instructions
1 Engage
Step 1
Have a discussion about chemistry and matter.
You could begin the first class by leading a short discussion. Ask students what they think the study of chemistry might be about. You can get a sense of student prior knowledge, identify some misconceptions, and just try to get students on the “same page.”
Tell students that chemistry is the study of matter and what matter does. You could go so far as to say that chemistry is the study of stuff and what stuff does on a very small scale. Ask students for the three common types of matter on Earth (solid, liquid, and gas).
Ask students questions such as the following to guide their thinking:
- What are some examples of matter?
Tell students that matter is often defined as anything that has mass and takes up space. Continue the discussion by using water as an example. - Does water have mass, and does it take up space?
A bucket of water is pretty heavy to lift. It definitely has mass. It also takes up space in the bucket. Since it has mass and takes up space, water is matter. But that’s just the very beginning. In chemistry, we want to look deeper and find out more about what matter is made of and how it acts.
2 Evaluate
Give each student an activity sheet.
- Lesson 1.1 Student Activity Sheet PDF | DOCX | Google Doc
- Lesson 1.1 Activity Sheet Answers PDF | DOCX | Google Doc
Download the student activity sheet, and distribute one per student.
The activity sheet will serve as the “Evaluate” component of each 5-E lesson plan. The activity sheets are formative assessments of student progress and understanding. A more formal summative assessment is included at the end of each chapter.
Students will record their observations and answer questions about the activity on the activity sheet. The Explain It with Atoms & Molecules and Take It Further sections of the activity sheet will either be completed as a class, in groups, or individually, depending on your instructions. Look at the teacher version of the activity sheet to find the questions and answers.
3 Explore
Step 2
Do an activity to explore the attractions water molecules have for each other.
In this activity, students look closely at a drop of water and move drops of water on wax paper. They see that the water holds together well and is not so easy to separate. The goal is for students to begin thinking about water, or any substance, on the molecular level and to conclude that water molecules must be attracted to one another. The reason for these attractions will be dealt with in later chapters.
Question to investigate
Does water hold together well or come apart easily?
Materials for each group
- Water in small cup
- Dropper
- 2 popsicle sticks
- Wax paper
- 2 large index cards (5 × 8")
- Tape
Teacher preparation
Cover a large index card with a piece of wax paper so that the wax paper completely covers the card. Tape the wax paper in place. Prepare two cards for each group.
Procedure
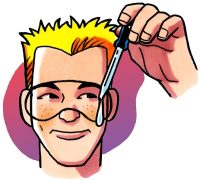
- Use the dropper to gently squeeze out a drop of water but try not to let the drop fall completely out of the dropper. See how far you can make the drop hang off the end of the dropper without the drop falling.
- Place 4 or 5 drops of water together on a piece of wax paper to make one medium size drop.
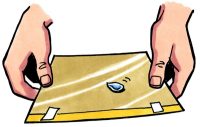
- Gently tilt the wax paper in different directions so that the drop moves.
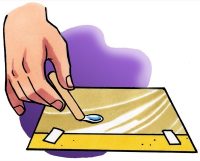
- Use a popsicle stick to slowly drag the drop around the wax paper a bit. Try using your popsicle stick to separate your drop into two.
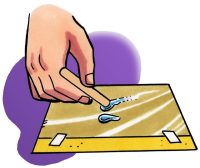
- Use your popsicle stick to move the drops near each other. Then move one drop so that the two drops touch.
Step 3
Record and discuss student observations.
Give students time after the activity to record their observations by answering the following questions on their activity sheet. Once they have answered the questions, discuss their observations as a whole group.
- When you squeezed the drop of water out of the dropper, did the water break apart or did it hold together?
- When you tilted the wax paper, did the drop split apart or stay together?
- When you were pulling the drop around the wax paper, did the water seem to hold together or come apart easily?
- When you tried to split your drop, did the drop separate easily?
- What happened when the two small drops touched?
Expected results
The water beads up on the wax paper and stays together when the wax paper is tilted and when the drop is moved around with a straw. It is difficult to separate the drop into two drops. When the drops touch, they combine quickly and easily.
Step 4
Do a demonstration to show that water molecules are in motion.
Materials
- Tall, clear plastic cup
- Water (room temperature)
- White sheet of paper
- Food coloring (red, blue, or green)
Procedure
- Add water to the cup until it is about ¾ filled.
- Ask students to watch closely as you add one or two drops of food coloring to the water. Do not stir. Instead, allow the color to slowly mix into the water on its own.
- Hold the cup up with a sheet of white paper behind it so it is easier for students to see the color moving and mixing in the water.
Expected results
The drops of food coloring will slowly move and mix into the water. Eventually all the water in the cup will be evenly colored.
Ask students:
How do your observations support the idea that water molecules are moving?
Help students understand that the drop of coloring mixes into the water because the water molecules move and push the color in all directions. The molecules of the food coloring themselves are also in motion.
Note: In chapter 5, students will learn that water molecules and coloring molecules are attracted to each other. These attractions also help explain the mixing of the color in the water.
4 Explain
Step 5
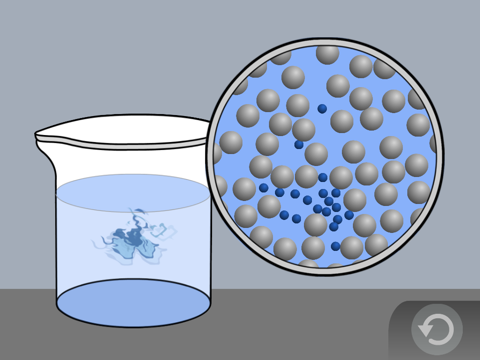
Show an animation of the molecules in liquid water.
Show the molecular model animation Particles of a Liquid.
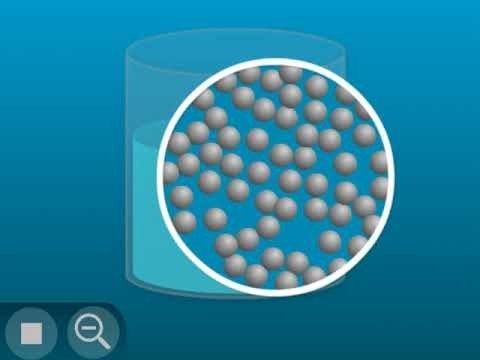
Explain that the little balls represent the particles of a liquid, in this case water molecules. Let students know that for now, they will use circles or spheres to represent atoms and molecules, but eventually they will use a more detailed model. For now, students should focus on the motion of the molecules, how they interact, and their distance from one another.
Point out that the molecules of a liquid are in motion, but they are attracted to each other. That’s why they move past each other but don’t get very far apart from one another.
Show the molecular model animation Food Coloring in Water

Explain to students, or have students explain how the random motion of the water molecules moves the food coloring throughout the water.
Step 6
Have students draw their own model of water on the molecular level and complete the activity sheet
Draw or project the illustration Water Molecules.
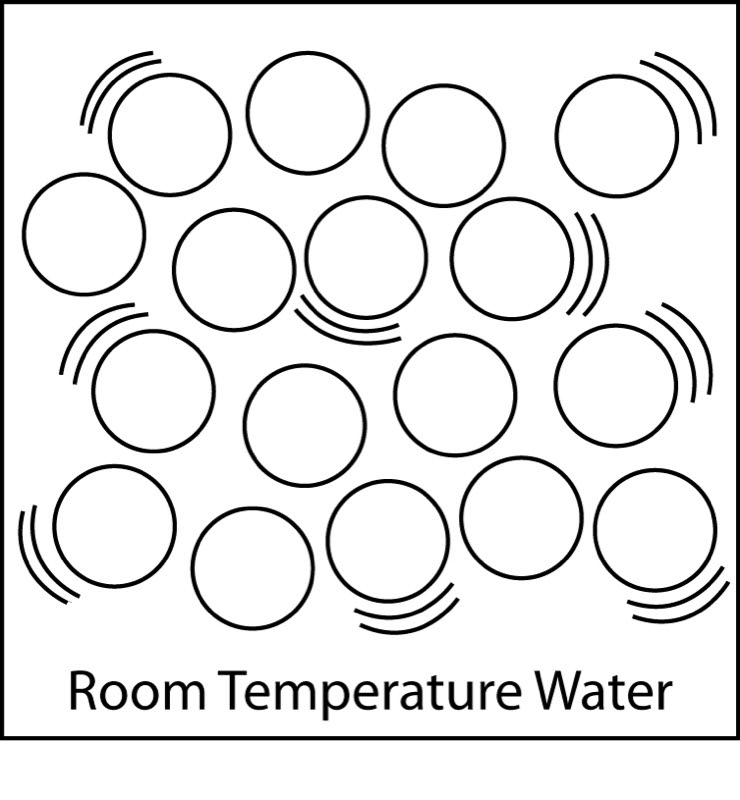
Explain to students that this is a model of water molecules. Point out that the molecules are not in any exact order but are near each other. They have little curved “motion lines” to show that the molecules are moving.
Have students draw a model of water on the molecular level on their activity sheet. They should use the model you have shown them to guide their own drawing.
Students’ drawings should show that the molecules are:
- Randomly arranged
- Close together
- Moving
Be sure students realize that this model shows water molecules enormously bigger than they actually are. Not only are water molecules much smaller, but they are also much more numerous. A single drop of water is made up of more than a billion trillion extremely tiny water molecules.
To give students an idea of how small and numerous water molecules are, you could tell students the following: In about 1 tablespoon of water, there are about 600 billion trillion water molecules. If you could count 1 million water molecules every second, it would take about 200 million centuries (20 billion years) to count all the molecules in that tablespoon of water. Atoms and molecules are huge in number and incredibly small in size.
5 Extend
Step 7
Show a video so that students can see an example that water molecules are attracted to one another.
Show a video of a water balloon popping in slow motion.
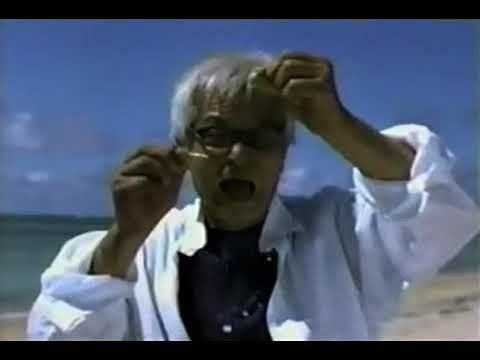
Ask students:
- Why do you think the water keeps its shape the moment the balloon is popped?
Students should realize that water holds together pretty well because the water molecules are attracted to each other. - Imagine a drop of water hanging from your finger. How is this similar to the water staying together after the balloon is popped?
This can also be explained by the fact that water molecules are very attracted to each other.
6 Extra Extend
Step 8
If you have time, give students the opportunity to play games with drops of water.
Water Drops Unite!
Teacher Preparation
Print 2 “Water Drops Unite” sheets for each group.
- Lesson 1.1 Student Activity Sheet PDF | DOCX | Google Doc (Find sheets in this document)

Procedure
- Tape a piece of wax paper over the “Water Drops Unite” sheet.
- Place about 5 drops of water in each of the small circles around the outside.
- As fast as you can, use your straw to drag each drop of water to the center. When all the drops are united in the center, you are done.
- Challenge your partner to see who can unite all their water drops the fastest.
Race Drop Raceway
Teacher Preparation
Print 2 “Race Drop Raceway” sheets for each group. You and a partner can follow the directions below to race each other.
- Lesson 1.1 Student Activity Sheet PDF | DOCX | Google Doc (Find sheets in this document)
Procedure
- Tape the “Race Drop Raceway” sheet onto a piece of cardboard to give it support.
- Tape a piece of wax paper over the “Race Drop Raceway” sheet.
- Place 2–4 drops of water together to make one larger drop at the “Start.”
- As fast as you can, tilt the cardboard and guide your race drop around the track to the “Finish.” Try not to touch the edge of the track. The first to finish is the winner.
What is the 5-E format?
The 5-E instructional model is an approach to teaching and learning that focuses on active engagement, inquiry-based learning, and collaboration.


Downloads
For Students
- Lesson 1.1 Student Activity Sheet PDF | DOCX | Google Doc
For Teachers
- Lesson 1.1 Lesson Plan PDF | DOCX | Google Doc
- Lesson 1.1 Activity Sheet Answers PDF | DOCX | Google Doc
Resources for the entire Chapter 1
- Chapter 1 Student Reading PDF | DOCX | Google Doc
- Chapter 1 Test Bank PDF | DOCX | Google Doc
Interactive Lesson Modules
- Lesson 1.1 Online Assignments Google Form
Have Questions? Visit Help Center
;void(0);)