By Alex Madonik
Introduction
On a hot day, there’s nothing better than a cold drink. You might not want to drink it all at once. If you leave the cold drink out in the hot sun, it won’t stay cold for long. How can you keep your drink cool for the longest amount of time? Insulate!
Materials
- Insulation materials to test: old socks, bubble wrap, coffee filters, flexible plastic foam, or any other material you want to test
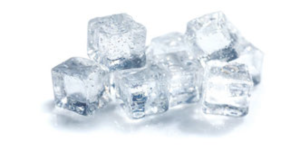
- Ice cubes
- Small, clear plastic cups (at least 3)
- Reusable plastic containers with snap-lids, big enough to hold the small plastic cups with insulation around them (at least 3)
- Clock or timer
- Optional: kitchen scale that reads to +/- 1 gram
Safety Suggestions
- Safety glasses suggested
- Do not eat or drink any of the materials used in this activity
- Thoroughly wash hands after this activity
- Handle the thermometer carefully so it doesn’t break. Some thermometers have sharp ends — so be careful!
Procedure
- Arrange each clear plastic cup in a “nest” of insulation in the reusable plastic container. As a control, place one cup in a container with no insulation around it.
- Put one or two ice cubes in each cup. If possible, weigh them to make sure that each cup starts with the same weight of ice, more or less.
- Every 30 minutes, check the ice in each cup to see how much has melted. If you have a scale, use a spoon to remove each ice sample and weigh it, then return it to the cup and put the cover back on the container. If you don’t have a scale, just observe the ice samples every 30 minutes and note the changes as they melt.
What did you observe?
Download and print this worksheet to record your observations.
What do these observations mean?
Which insulation worked best at keeping the ice frozen? Compare the sample that melted the most to the sample that melted the least. How much longer did the well-insulated ice cubes last compared to the ones with no extra insulation? What do you think makes one kind of insulation work better than another?
How does it work?
Heat always transfers from hot to cold. In this case, the heat comes from the surroundings of the cup, which are much warmer than the ice. The ice melts when it absorbs heat from the surroundings. To prevent heat transfer, we place a barrier between the cup and the air. If the barrier slows down the transfer of heat, it is an insulator. Some materials do a better job slowing the transfer of heat than others. What piece of clothing do you own that is made with a good insulator? Hint: This item keeps part of your body feeling warm when it is cold outside.
Alex Madonik, Ph.D. is a Chemistry Instructor at Peralta Community College in Oakland, California.


;void(0);)