Lesson Overview for Teachers
View the video below to see what you and your students will do in this lesson.
Objective
Students will be able to explain that cooling water can change it to ice and that heating ice can change it back to liquid water. Students will be able to explain that this process can also happen to other substances. Students will also be able to explain that heating a substance makes its molecules move faster and cooling a substance makes its molecules move slower. The lesson can also be used to lay a foundation for learning about changes in state and chemical changes which can be further developed in later grades.
Key Concepts
- If water is cooled enough it can change to ice.
- If ice is warmed enough, it can change to liquid water.
- Heating a substance makes the molecules move faster.
- Cooling a substance makes the molecules move slower.
NGSS Alignment
- NGSS 2-PS1-4: Construct an argument with evidence that some changes caused by heating and cooling can be reversed and some cannot.
Summary
- Students see a video of water freezing and then melting.
- Students warm butter until it melts and then cool it until it turns hard again.
- Students view an animation showing that heat causes the molecules in butter to move faster and separate from each other. They also see that cooling butter makes the molecules move more slowly and come back together.
- Students participate in a class discussion about how heating and cooling can cause changes in matter.
Evaluation
Download the Student Activity Sheet (PDF) and distribute one per student when specified in the activity. The activity sheet will serve as the Evaluate component of the 5-E lesson plan.
Safety
Be sure students wear properly fitting goggles.
Materials for each group
- Small plastic cup with ¼ teaspoon of butter in it
- 2 Popsicle sticks
- Cup for hot water
- Cup for ice water
ENGAGE
1. Show a time lapse video of water freezing and ice melting to introduce the idea that cooling and heating can cause a change in a substance.
Ask students:
- What can happen to water if you make it really cold?
The water can turn into ice.
Explain to students that when water freezes, it changes from a liquid to a solid.
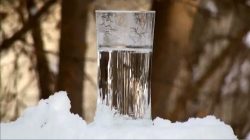
Show the time lapse video Water Freezing.
Note: Tell students that this is a special type of video in which something that takes a long time can be shown in a much shorter time. The freezing of the water in the glass probably took at least six hours. The video was taken for the whole six hours but is shown speeded up so that the freezing process can be shown in about 1 minute. Tell students that this type of video is called “time lapse”.
Ask students
- How could the ice be made to turn back into liquid water?
Warm the ice to make it melt.
Show the time lapse video Ice Melting.
Explain that warming ice makes it change from solid ice to liquid water.
Note: Students may not realize that the ice is being warmed just by being at room temperature. They may expect to see the ice put on the stove or held over a candle flame. Explain to students that the ice is being warmed because it is at normal room temperature and that room temperature is warmer than the temperature of the ice. Normally ice needs to be in a freezer at a low temperature or outside in cold weather (32 °F or 0°C or lower) to stay frozen as ice. If it is placed on a surface in a room at normal temperature, it is actually being warmed.
Explain to students that water can be cooled to make ice and then the ice can be warmed to make liquid water again. Cooling and heating water in this way can make the changes go back and forth.
Give each student an Activity Sheet (PDF).
Students will record their observations and answer questions about the activity on the activity sheet.
EXPLORE
2. Have students investigate what happens when butter is heated.
Question to Investigate: How does butter change when you warm and cool it?
Materials for each group
- Small plastic cup with ¼ teaspoon of butter in it
- 2 Popsicle sticks
- Cup for hot water
- Cup for ice water
Have students come to the front of the class. Show students a stick of butter at room temperature. Use a popsicle stick to show that it is soft and can be cut easily.
Ask students
- How do you think the butter will change if you heat it?
If it is heated enough it will melt and become a liquid.
Explain to students that when scientists have a question they do an investigation to try to find the answer. Tell students that they can be the scientists and do an investigation to find the answer to the question.
Procedure
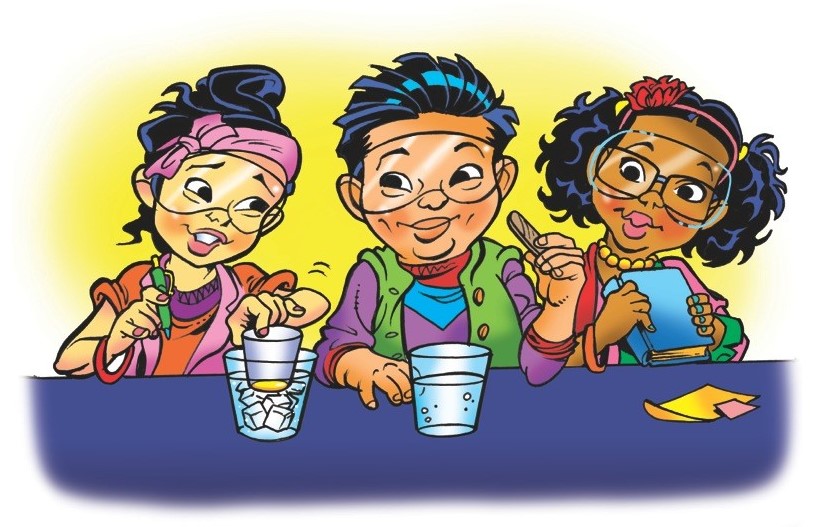
- Carefully push your plastic cup with the butter a little way into the hot water cup.
- Use the popsicle stick to move the butter around in the bottom of the cup. If the butter gets stuck on the popsicle stick, use the other popsicle stick to push the butter back down into the cup.
- Keep the cup in the hot water and keep stirring until you see a change in the butter. Keep stirring until the butter doesn’t change any more.
Note: Tell students that while they heat the butter and stir it, you will stir the same amount of butter in the same type of cup but not heat it. Explain that you want to see if anything happens to the butter from just stirring it, or if it’s the heat that really causes the melting.
Ask students:
- What did you see happen to the butter?
It melted and became a liquid. - How did you know it was a liquid?
When we tilted the cup, the butter flowed.
Note: Let students know that the butter you stirred without heating didn’t change much at all. The change must have been caused by the heat and not just the stirring.
3. Have students investigate what happens when the liquid butter is cooled.
Ask Students:
- Do you think the liquid butter would get hard again if you cooled it?
- Take the cup out of the hot water and place it in the cup of ice water. Do not stir the liquid butter this time.
- Keep the cup in the ice water and gently touch the butter with your Popsicle stick. If the butter seems hard, scrape some up with the Popsicle stick.
Ask students:
- What do you notice after the butter is in the cold water for a couple of minutes?
It is hard again.
EXPLAIN
4. Show an animation to explain that heating makes things move faster and come apart and cooling makes things move slower and connect together.
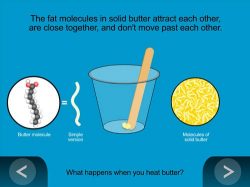
Show the animation Heating and Cooling.
Explain that the butter is made up of molecules of fat. When the butter is solid, the molecules are close together and do not move past each other. When the butter is heated, the molecules begin to move and are able to slide past each other and become a liquid. When the liquid butter is cooled, the molecules slow down and reconnect to become a solid again.
EXTEND
5. Show time lapse videos of ice cream melting.
Ask students:
- What changes happen if you heat ice cream?
The ice cream turns into a sticky liquid.
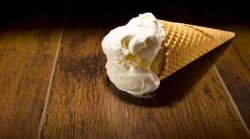
Show the video Melting Ice Cream Bar.
Ask students:
- Could the liquid from the melted ice cream bar be put in the freezer to make ice cream again?
Yes. Explain that warming ice cream makes it change to a liquid, but the liquid can be cooled and changed back to solid ice cream again. The lightness of the ice cream usually changes because the refrozen ice cream does not have as much air mixed in with it.
As an extra extension, you could show students an animation about how ice cream is made from Secret Science of Stuff – Ice cream.

