Lesson Overview for Teachers
View the video below to see what you and your students will do in this lesson.
Objective
Students will be able to explain that when some substances are heated to a certain extent, they change in a way that they cannot be changed back by cooling them.
Key Concepts
- Heating can make a substance change.
- Heating can make some substances change in a way that they cannot be changed back again by cooling.
NGSS Alignment
- NGSS 2-PS1-4: Construct an argument with evidence that some changes caused by heating and cooling can be reversed and some cannot.
Summary
In the previous lesson, students saw that some substances that change when heated can be changed back again when cooled.
- Students see a time lapse video of cookie dough being baked into cookies.
- Students participate in a class discussion about heating causing changes that cannot be reversed when cooled.
- Students learn that heating baking powder in the cookie dough makes a gas and causes the little holes in the cookie.
- Students design and conduct an experiment to see if baking powder causes more bubbling when it is warm or cold.
Evaluation
Download the student activity sheet and distribute one per student when specified in the activity. The activity sheet will serve as the Evaluate component of the 5-E lesson plan.
Safety
Be sure students wear properly fitting goggles.
Materials for the demonstration
- Cookie dough
- Cookie
- Room temperature water
- Baking powder (Made by teacher)
- Detergent solution
- Dropper
Materials for each group
- 2 cups with ½ teaspoon baking powder
- 1 cup with hot water (plus 1 drop detergent solution)
- 1 cup with ice water (plus 1 drop detergent solution)
Teacher preparation
Note: This experiment works best if you make your own “baking powder” by mixing cream of tartar and baking soda.
- Make a baking powder mixture by placing about 2 tablespoons of cream of tartar and 1 tablespoon of baking soda and in a cup. Use a popsicle stick or plastic spoon to mix the powders thoroughly.
- Make a detergent solution by adding 1/2 teaspoon of Dawn dishwashing liquid to 1 tablespoon of water. Gently stir to mix.
ENGAGE
1. Lead a discussion about whether heat can change things so much that they can’t be changed back by cooling.
Remind students of the videos they saw in which ice melted into liquid water and liquid water froze to form ice. Remind students that butter changed to a liquid when they heated it and became solid again when they cooled it.
Ask students:
- Do you think there are things that change when you heat them that cannot be changed back again by cooling?
If students can’t think of examples, suggest that if logs, sticks, or paper get hot enough, they can catch on fire. But once they burn, you can’t get the log, stick, or paper back no matter how much you cool the ashes.
Explain that sometimes heating can cause such a big change in a substance that it cannot be changed back again by cooling. Tell students that this happens all the time in cooking and baking.
2. Show students cookie dough and how it changes when heated by baking.
Procedure
- Show students the cookie dough.

Ask students:
- How would you describe the cookie dough?
It is like a thick paste that can be molded.
- Show students a cookie compared to the cookie dough.
Ask students:
- What does the cookie dough look like after it is heated in the oven and becomes a cookie?
It looks flatter and rounder and more solid. - If you break a cookie and look inside, what do you notice about the texture of the inside?
It looks kind of rough and has little holes and spaces. - Can you cool a cookie to make it change back into dough again?
No
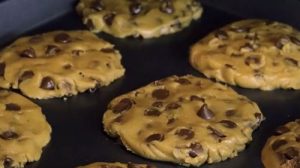
- Show the time-lapse video Cookies Baking in Oven.
Introduce students to the idea that ingredients in the dough interacted with one another as the dough was heated. You can tell students that the ingredients had a chemical reaction. The reaction made the dough become solid and also produced gases. Tell students that little gas bubbles make all the little holes and empty spaces that make cookies and cake light and fluffy.
Give each student an Activity Sheet (PDF).
Students will record their observations and answer questions about the activity on the activity sheet.
EXPLORE
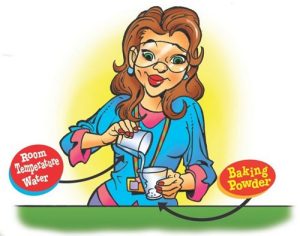
3. Demonstrate how room temperature water causes baking powder to react and make bubbles.
Explain to students that one of the ingredients in cookie dough and cake batter that makes cookies and cakes rise is called baking powder. Baking powder mixes with the liquid in the dough or batter and, when heated in the oven, reacts and makes bubbles.
Procedure
- Place ½ teaspoon of baking powder in a small clear plastic cup.
- Add 1 Tablespoon (15 mls) of room temperature water to a separate plastic cup.
- Add 1 drop of detergent solution to the water and gently swirl to mix.
- Hold up the cup so students can see or have them come to the front of the class for a closer look.
- Pour the water into the cup with the baking powder and look for any bubbles.
Expected results
Foam should be produced.
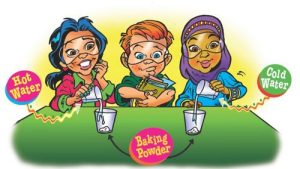
4. Have students help design an experiment to compare the bubbling of “baking powder” in hot and cold water.
Question to investigate: Does baking powder produce more bubbles when the water is hot or when it is cold?
Note: This experiment works best if there is a large temperature difference between the cold and hot water. For the hot water, you can use hot tap water. For the cold water, you can put ice in cold tap water to make the cold water very cold.
Tell students that when scientists have a question, they do an experiment to try to find the answer. Tell students that they can be scientists and do an experiment to see if baking powder makes more bubbles in hot water or cold water.
Ask students:
- For our experiment, should we put the same amount of baking powder in each cup?
Yes - Should we add the same amount of hot water and the cold water to the baking powder?
Yes - Should we put the hot and cold water in the baking powder at the same time so we can see if there is a difference?
Yes
Remind students that in order to compare substances in a good experiment, they need to be tested in the same way. So the experiment should test the same amount of baking powder in the same amount of hot and cold water at the same time.
4. Test the baking powder in hot and cold water.
Teacher preparation
- Place about ½ teaspoon of baking powder in two small clear plastic cups for each group.
- Put ice in water to make cold water. Make enough cold water so that each group gets about 1 tablespoon (15 milliliters).
- Place about 1 tablespoon of hot tap water and ice cold water in separate cups for each group.
- Use a dropper to add 1 drop of detergent solution to the cup of hot and cold water for each group.
Materials for each group
- 2 cups with ½ teaspoon baking powder
- Cup with 1 Tablespoon hot water (plus 1 drop detergent solution)
- Cup with 1 Tablespoon ice water (plus 1 drop detergent solution)
Procedure
- At the same time, you and your partner pour all of the cold water into one of the baking powder cups and all of the hot water into the other baking powder.
Expected results
The baking powder in the hot water will foam up much more and faster than the baking powder in the cold water.
Ask students:
- What did you notice?
The baking powder in the hot water foamed up much more and faster than the baking powder in the cold water.
EXPLAIN
5. Show an animation to help explain why baking powder makes more bubbles when heated than when cooled.
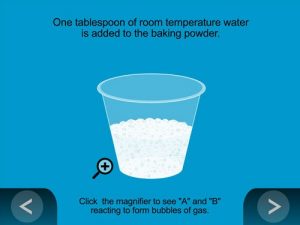
Show the animation Testing Baking Powder at Different Temperatures.
Explain that when water is added to baking powder, the ingredients in the powder mix together and have a chemical reaction. When a chemical reaction happens, something new is made, like the gas that makes the bubbles. When the water is hotter, the ingredients mix together faster and the reaction happens faster, too. That’s why you see more bubbles in hot water than in cold water.
EXTEND
6. Show an animation about the changes that happen in making popcorn.
Tell students that another example of heat causing a change is making popcorn.
Show the animation Popcorn.
Explain that making popcorn is different than baking a cake, but it is still heat that causes the change. Heat causes the inside of the corn to change and puff out to make delicious popcorn! And it won’t go back no matter how much you cool it.

