Temperature and the Rate of a Chemical Reaction
Lesson Summary Video for teachers
Note: This video is designed to help the teacher better understand the lesson and is NOT intended to be shown to students. It includes observations and conclusions that students are meant to make on their own.
Key Concepts
- Reactants must be moving fast enough and hit each other hard enough for a chemical reaction to take place.
- Increasing the temperature increases the average speed of the reactant molecules.
- As more molecules move faster, the number of molecules moving fast enough to react increases, which results in faster formation of products.
Summary
Students will make the same two clear colorless solutions (baking soda solution and calcium chloride solution) from Lesson 3. They will help design an experiment to see if the temperature of the solutions affects how fast they react. Students will then try to explain, on the molecular level, why the temperature affects the rate of the reaction.
Objective
Students will be able to identify and control variables to design an experiment to see if temperature affects the rate of a chemical reaction. Students will be able to explain, on the molecular level, why the temperature of the reactants affects the speed of the reaction.

Safety
Be sure you and the students wear properly fitting goggles. Use caution when handling hot water.
Materials for the Demonstration
- Hot water in an insulated cup
- Ice water in an insulated cup
- 2 glow sticks
Materials for Each Group
- Baking soda
- Calcium chloride
- Water
- Graduated cylinder
- Balance or measuring spoon (teaspoon)
- 2 wide (9 oz) clear plastic cups
- 4 small clear plastic cups
- 2 plastic deli-style containers
- Hot water (40–50 °C)
- Cold water (0–5 °C)
- Masking tape
- Pen
Download All Lesson 6.4 Resources
Get the entire lesson plan and Student Activity Sheet for "Lesson 6.4 - Temperature and the Rate of a Chemical Reaction."
Online Assignments
Supplement in-class learning with interactive, multimedia-rich Google Forms lesson modules, perfect for reinforcing key chemistry concepts and scientific investigation skills.
Instructions
1 Engage
Step 1
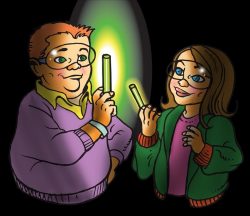
Do a demonstration with glow sticks to introduce the idea that temperature can affect the rate of a chemical reaction.
Question to Investigate
How does warming or cooling a glow stick affect its chemical reaction?
Materials for the Demonstration
- Hot water in an insulated cup
- Ice water in an insulated cup
- 2 glow sticks
Teacher preparation
Be sure not to start the glow sticks as you prepare for the demonstration. Place one glow stick in hot water and another in ice water before students arrive. The glow sticks will need to be in the water for at least a couple of minutes before the demonstration.
Tell students that you have heated one glow stick and cooled another.
Ask students:
- How do you start a glow stick?
Bend the stick until you hear a popping sound. - What should you do if you want your glow stick to last longer?
Place the glow stick in the freezer when you are not using it.
Explain that when students bend the stick to start it, they are breaking a small container filled with a chemical inside the light stick. Once broken, the chemicals, which were separate, combine and react with each other. If putting a glow stick in the freezer makes it last longer, temperature may have something to do with the rate of the chemical reaction.

Procedure
- Remove the glow sticks from both the hot and cold water.
- Have two students bend and start the glow sticks.
- Show students both glow sticks and ask them what they observe. You may pass the sticks around the class so that they can feel the difference in temperature.
Expected Results
The warm glow stick will be brighter than the cold one.
Ask students:
- How can you tell whether the chemical reaction is happening faster or slower in each glow stick?
The warm glow stick is brighter, so the chemical reaction may be happening faster.
The cool glow stick is not as bright, so the chemical reaction may be happening slower. - Some people place glow sticks in the freezer to make them last longer. Why do you think this works?
The chemical reaction that happens in a light stick is slower when cold. - Do you think that starting with warmer reactants increases the rate of other chemical reactions? Why?
It is reasonable to think that temperature will affect the rate of other chemical reactions because temperature affected this reaction.
2 Evaluate
Give each student an activity sheet.
- Lesson 6.4 Student Activity Sheet PDF | DOCX | Google Doc
- Lesson 6.4 Activity Sheet Answers PDF | DOCX | Google Doc
Download the student activity sheet, and distribute one per student.
The activity sheet will serve as the “Evaluate” component of each 5-E lesson plan. The activity sheets are formative assessments of student progress and understanding. A more formal summative assessment is included at the end of each chapter.
Students will record their observations and answer questions about the activity on the activity sheet. The Explain It with Atoms and Molecules and Take It Further sections of the activity sheet will either be completed as a class, in groups, or individually depending on your instructions. Look at the teacher version of the activity sheet to find the questions and answers.
3 Explore
Step 2
Ask students how they could set up an experiment to find out if the temperature of the reactants affects the speed of the reaction.
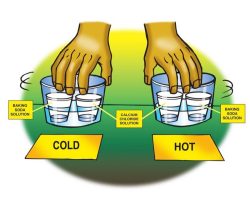
Review with students the chemical reactions they did in the last lesson. They combined a calcium chloride solution with a baking soda solution. They saw that when the solutions were combined, a solid and a gas were produced. Tell students that they will warm and cool a calcium chloride solution and a baking soda solution to find out whether temperature affects the rate of the chemical reaction.
Ask students:
- How many sets of solutions should we use?
Students should use two sets—one that is heated and one which is cooled. Tell students that they will use hot and cold-water baths, like in the demonstration, to warm and cool the solutions. - Should the warmed samples of baking soda solution and calcium chloride solution be the same as the samples that are cooled?
Yes. Samples of the same solution should be used and the same amount of cold solution as warm solution should be used. - In the glow stick demonstration, we could tell that the reaction was happening faster if the light was brighter. How can we tell if the reaction is happening faster in this chemical reaction?
The chemical reaction is happening faster, if more products are produced. We should look for more bubbling (carbon dioxide) and more white precipitate (calcium carbonate).
Step 3
Have students warm a pair of reactants and cool another and compare the amount of products in each reaction.
Question to Investigate
Does the temperature of the reactants affect the rate of the chemical reaction?
Materials for Each Group
- Baking soda
- Calcium chloride
- Water
- Graduated cylinder
- Balance or measuring spoon (½ teaspoon)
- 4 small plastic cups
- 2 plastic deli-style containers
- Hot water (about 50 °C)
- Cold water (0–5 °C)
- Masking tape
- Pen
Procedure
Make the Baking Soda Solution
- Use masking tape and a pen to label 2 small plastic cups baking soda solution, and 2 small plastic cups calcium chloride solution.
- Use a graduated cylinder to add 20 mL of water to one of the baking soda solution cups.
- Add 2 g (about ½ teaspoon) of baking soda to the water in its labeled cup. Swirl until as much of the baking soda dissolves as possible. (There may be some undissolved baking soda in the bottom of the cup.)
- Pour half of your baking soda solution into the other baking soda solution cup.
Make the Calcium Chloride Solution
- Use a graduated cylinder to add 20 mL of water to one of the calcium chloride solution cups.
- Add 2 g (about ½ teaspoon) of calcium chloride to the water in its labeled cup. Swirl until the calcium chloride dissolves.
- Pour half of your calcium chloride solution into the other calcium chloride solution cup.

Heat and Cool the Solutions
- Pour hot water into one plastic container and cold water into the other until each is about ¼ filled. The water should not be very deep. These are your hot and cold-water baths.
- Place and hold one cup of baking soda solution and one cup of calcium chloride solution in the hot water. Gently swirl the cups in the water for about 30 seconds to heat up the solutions.
- Your partner should place and hold one cup of baking soda solution and one cup of calcium chloride solution in the cold water. Gently swirl the cups in the water for about 30 seconds to cool the solutions.
Combine the Solutions
- At the same time, you and your partner should combine the two warm solutions with each other, and the two cold solutions with each other.
Expected Results
The warm solutions will react immediately and much faster than the cold solutions. Bubbling and particles of white solid will quickly appear in the combined warm solutions.
The cold solutions will turn a cloudy grayish and stay that way for a while. Eventually the combined solutions will gradually turn white and bubble, and particles of white solid will appear.
Step 4
Discuss student observations.
Ask students:
- Does the temperature of the reactants affect the rate of the chemical reaction?
Yes. The warm solutions react much faster than the cold solutions.
4 Explain
Step 5
Show students that the faster moving molecules in the warm reactants hit each other with more energy and so are more likely to react.
Ask students:
- On the molecular level, why do you think the warm solutions react faster than the cold solutions?
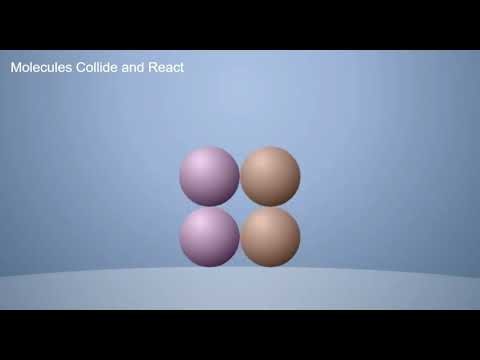
Explain to students that for reactant molecules to react, they need to contact other reactant molecules with enough energy for certain atoms or groups of atoms to come apart and recombine to make the products. When the reactants are heated, the average kinetic energy of the molecules increases. This means that more molecules are moving faster and hitting each other with more energy. If more molecules hit each other with enough energy to react, then the rate of the reaction increases.
Project the animation Molecules collide and react.
Point out that the slower-moving molecules hit and bounce off without reacting. But the faster-moving molecules hit each other with enough energy to break bonds and react.
5 Extend
Step 6
Introduce the idea that energy must be added for some chemical reactions to occur.
Tell students that the reaction between baking soda solution and calcium chloride solution happens at room temperature. Students saw that the rate of the reaction can be sped up if the reactants are warmed and slowed down if the reactants are cooled.
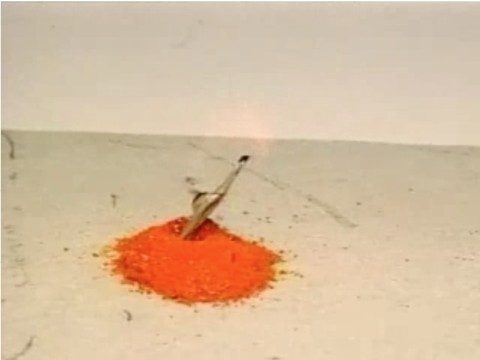
Explain that there are many reactions that will not occur at all at room temperature. For these reactions to occur, the reactants need to be heated. When they are heated, the reactants gain enough energy to react. Often, once a reaction has started, the energy produced by the reaction itself is enough to keep it going.
Project the video Volcano.
Tell students that this reaction requires heat to get started but produces enough heat to keep reacting. You could also mention to students that a common burning candle works the same way. The wax of the candle and oxygen do not react until the heat of a match is added. Then, the heat from the burning wax supplies the heat to keep the reaction going.
What is the 5-E format?
The 5-E instructional model is an approach to teaching and learning that focuses on active engagement, inquiry-based learning, and collaboration.
Downloads
For Students
- Lesson 6.4 Student Activity Sheet PDF | DOCX | Google Doc
For Teachers
- Lesson 6.4 Lesson Plan PDF | DOCX | Google Doc
- Lesson 6.4 Activity Sheet Answers PDF | DOCX | Google Doc
Resources for the entire Chapter 6
- Chapter 6 Student Reading PDF | DOCX | Google Doc
- Chapter 6 Test Bank PDF | DOCX | Google Doc
Interactive Lesson Modules
- Lesson 6.4 Online Assignments Google Form
Have Questions? Visit Help Center


