Air, It’s Really There
Lesson Summary Video for teachers
Note: This video is designed to help the teacher better understand the lesson and is NOT intended to be shown to students. It includes observations and conclusions that students are meant to make on their own.
Key Concepts
- In a gas, the particles (atoms and molecules) have weak attractions for one another. They are able to move freely past each other with little interaction between them.
- The particles of a gas are much more spread out and move more independently compared to the particles of liquids and solids.
- Whether a substance is a solid, liquid, or gas at a certain temperature depends on the balance between the motion of the particles at that temperature and how strong their attractions are for one another.
- Heating a gas increases the speed of its atoms or molecules.
- Cooling a gas decreases the speed of its atoms or molecules.
Summary
Students compare the mass of a basketball when it is deflated and after it has been inflated. The inflated ball has the greater mass, so students can conclude that gas is matter because it has mass and takes up space. Then students consider how heating and cooling affect molecular motion in gases. They dip the mouth of a bottle in detergent solution and observe a bubble growing and shrinking when the bottle is warmed and cooled. Students will learn that the attractions between the particles of gases are weak compared to the attractions between the particles of liquids or solids.
Objective
Students will be able to describe gas as matter. They will also be able to describe, on the molecular level, the effect of heating and cooling on the motion of molecules of a gas.
Safety
- Be sure you and the students wear properly fitting goggles.
- Students should use care when handling hot tap water.
Materials for Each Group
- 2 clear plastic cups
- 8-oz plastic bottle
- Detergent solution in a cup
- Hot water (about 50 °C)
- Cold water
Materials for the Demonstration
- Basketball, very deflated
- Balance that measures in grams
- Pump
- Can of compressed gas (available at any office supply store)
Download All Lesson 1.5 Resources
Get the entire lesson plan and Student Activity Sheet for "Lesson 1.5: Air, It’s Really There."
Online Assignments
Supplement in-class learning with interactive, multimedia-rich Google Forms lesson modules, perfect for reinforcing key chemistry concepts and scientific investigation skills.
Instructions
1 Engage
Step 1
Discuss with students whether they think gas is matter.
Ask students about gases:
- Are gases, such as the gases in air, matter?
Students may have questions about whether or not gases are matter. They may also have only a very vague sense of what gases are at all. After students reply, explain that the air around them is made up of some different gases—nitrogen, oxygen, carbon dioxide, water vapor, and very small amounts of some others. Tell students that gases are made of molecules but that the molecules are much further apart than the molecules in liquids or solids. Since the molecules of a gas have mass and take up space, gas is matter.
If students have trouble accepting or appreciating that a gas is made up of molecules, you could try helping them by giving them some numbers to think about. Although these numbers are huge and may be difficult to comprehend, at least students will get the idea that a gas is definitely made of something, takes up space, and has mass. Tell students that in an amount of air about the size of a standard beach ball, there are about 6 × 10²³ gas molecules. This is about 600 billion trillion molecules.
Students may have difficulty imagining that gases have mass. It seems like balloons and beach balls, for example, get lighter when we inflate them. When you add air to a balloon or beach ball it actually gets a little heavier. The reason why it seems lighter is not because it has less mass, but because its volume increases so much when it is inflated. This big increase in volume with a small increase in mass makes the balloon or beach ball less dense. That is why it seems lighter when it is inflated. (We’ll get to this when we study density in Chapter 3.)
Step 2
Do a demonstration to show that gas has mass.
You will need a balance that measures in grams for either demonstration. If you don’t have this type of balance, you can show videos of each demonstration.
Materials for the demonstration
- Basketball, very deflated
- Balance that measures in grams
- Pump
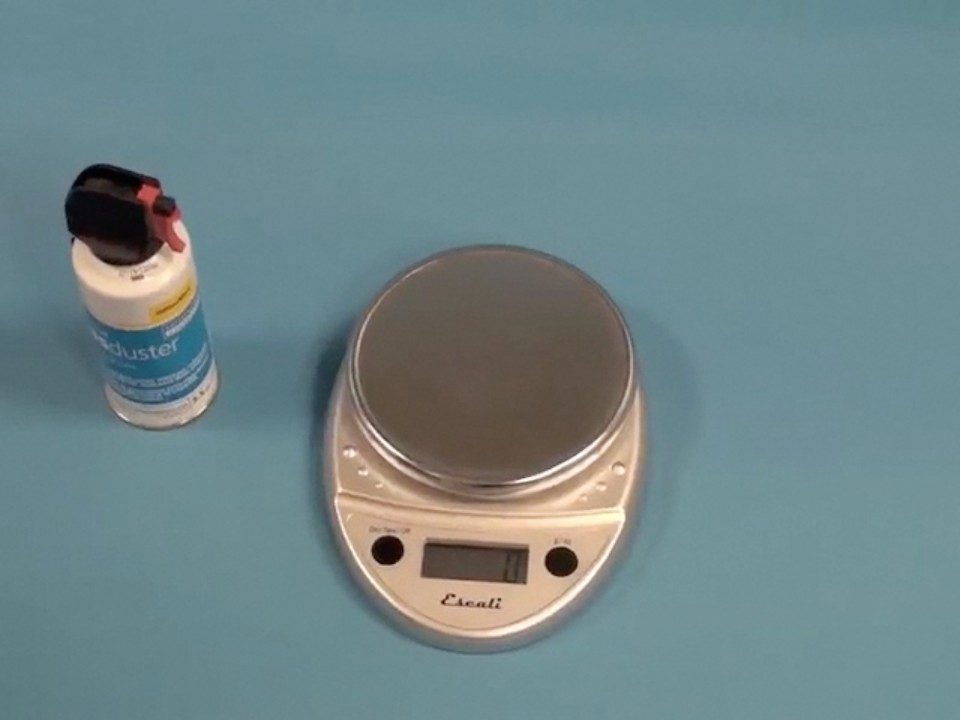
- Can of compressed gas (available at any office supply store)

Procedure
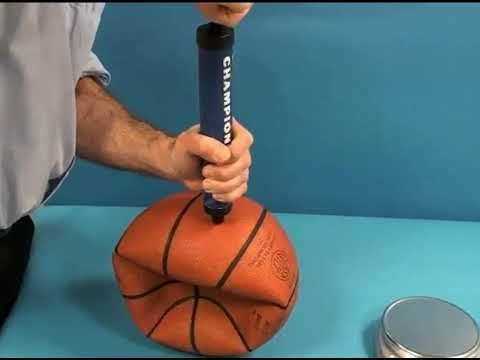
A. Basketball
- Place the deflated ball on the balance to get the initial mass.
- Ask students if they think the ball will weigh more or less after you pump air into it.
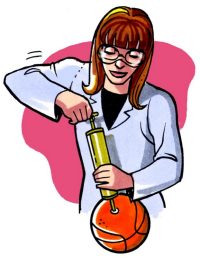
- Pump as much air into the basketball as you can and then put it back on the balance.
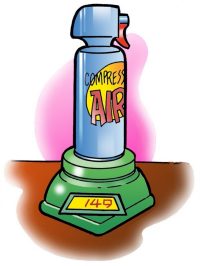
B. Can of compressed gas
- Place a can of compressed gas on a scale and check its mass.
- Ask students whether it will weigh more, less, or the same if you squeeze the trigger and let some gas out.
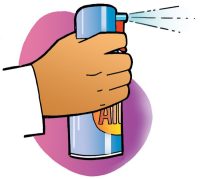
- Shoot gas out of the can for a few seconds and then place the can back on the scale.
Expected results
The basketball should weigh 2–4 grams more than when it was deflated. The can will weigh a few grams less than it did initially.
Step 3
Show an animation of the molecules of a gas.
Show the molecular model animation Particles of a Gas.
Explain to students that the molecules of a gas have very little attraction for one another and barely interact with each other. They just collide and bounce off. It may be hard for students to accept, but in the space between the gas molecules there is nothing.
Note: An inquisitive student might ask: If gas molecules aren’t attracted to each other and can just float around, why don’t they all just float away? That is a very good question. In fact, very light gases like hydrogen and helium have floated away and there are very little of these gases in our atmosphere. Different heavier gases, such as nitrogen, oxygen, water vapor, and carbon dioxide, surround the Earth. In the big picture, gravity holds these gases near the Earth as our atmosphere.
2 Evaluate
Give each student an activity sheet.
- Lesson 1.5 Student Activity Sheet PDF | DOCX | Google Doc
- Lesson 1.5 Activity Sheet Answers PDF | DOCX | Google Doc
Download the student activity sheet, and distribute one per student.
The activity sheet will serve as the “Evaluate” component of each 5-E lesson plan. The activity sheets are formative assessments of student progress and understanding. A more formal summative assessment is included at the end of each chapter.
Students will answer questions about the demonstration on the activity sheet. The Explain It with Atoms & Molecules and Take It Further sections of the activity sheet will either be completed as a class, in groups, or individually depending on your instructions. Look at the teacher version of the activity sheet to find the questions and answers.
3 Explore
Step 4
Have students do an activity to find out how heating and cooling affect gases
Question to investigate
How does heating and cooling affect a gas?
Materials for each group
- 2 clear plastic cups
- 8-oz plastic bottle
- Detergent solution in a cup
- Hot water (about 50 °C)
- Cold water
Teacher preparation
Make the detergent solution for the entire class by adding 4 teaspoons of dishwashing liquid and 4 teaspoons of sugar to ½ cup of water. Gently stir until the detergent and sugar are dissolved. Place about 1 tablespoon of detergent solution in a wide clear plastic cup for each group.
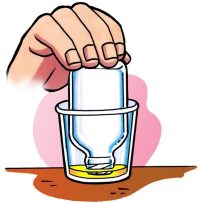
Procedure
A. Warming the air inside the bottle
- Pour hot water into an empty cup until it is about ½-full.
- Turn the bottle over and dip the opening of the bottle into the detergent to get a film of detergent covering the rim.
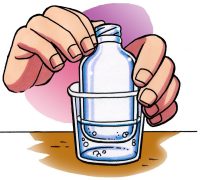
- While holding the bottle, slowly push the bottom of the bottle down into the hot water.
Ask students:
- What can you do to make the bubble go down?
If students have trouble thinking of an answer, remind them that heating the gas increased the speed of the molecules, which made the bubble grow. Students should suggest that they should cool the gas in the bottle. This can be done by putting the base of the bottle into cold water.
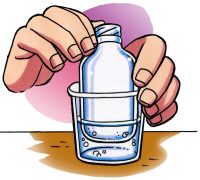
B. Cooling the air inside the bottle
- Pour cold water into another cup until it is about ½-full.
- If there is still a bubble on the bottle, slowly push the bottom of the bottle down into the cold water.
- If a bubble is not still on the bottle, make another bubble by dipping the opening into detergent and then pushing the bottom of the bottle into hot water again.
- While holding the bottle, slowly push the bottom of the bottle down into the cold water.
Expected results
When the bottle is placed in hot water, a bubble forms at the top of the bottle. When the bottle is placed in cold water, the bubble gets smaller. It may actually be pushed down into the bottle.
Step 5
Record and discuss student observations.
Give students time after the activity to record their observations by answering the following questions on their activity sheet. Once they have answered the questions, discuss their observations as a whole group.
- What happened to the film of detergent solution when you placed the bottle in hot water?
It formed a bubble. - What happened to the bubble when you placed the bottle in cold water?
It shrunk and went into the bottle.
Tell students that you will show them an animation to help explain what caused the bubble to grow and shrink when the air in the bottle was heated and cooled.
4 Explain
Step 6
Show an animation of a bubble as it is heated and cooled.
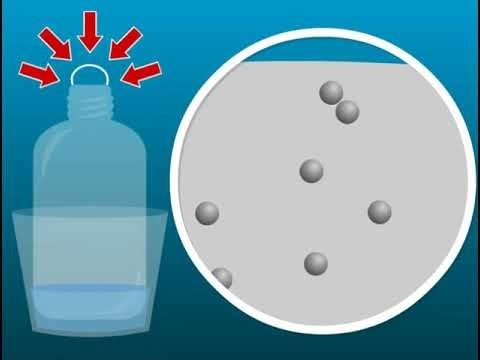
Show the animation Heating and Cooling Gas in a Bottle.
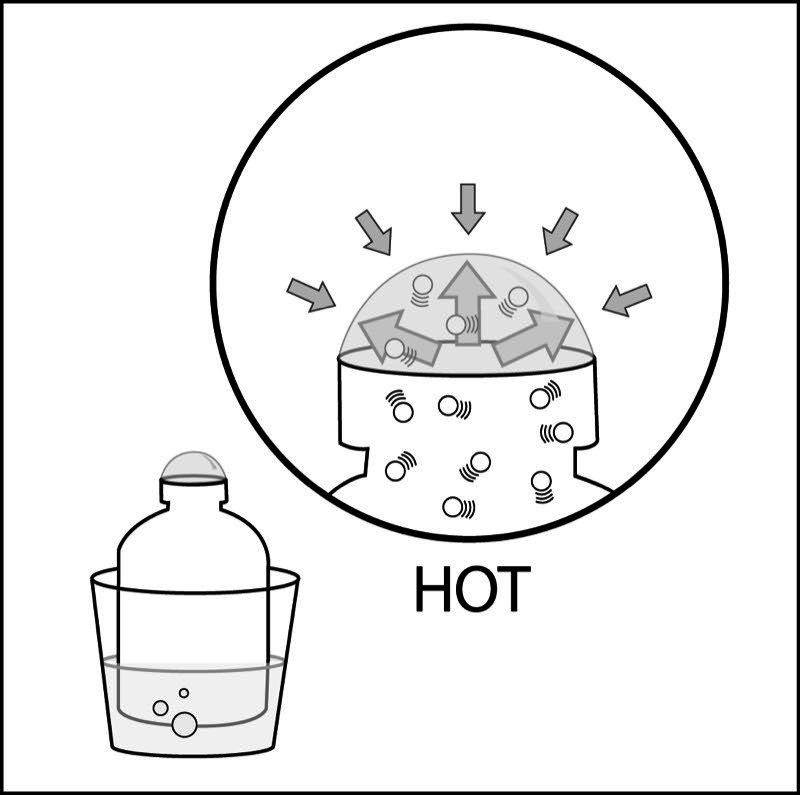
Tell students that the red arrows in the animation represent the outside air pushing down on the bubble film. Explain that heating the air inside the bottle makes the molecules move faster. These faster-moving molecules hit the inside of the bottle and the bubble film harder and more frequently. These molecules push against the inside of the bubble film harder than the surrounding air pushes from the outside. This pushes the bubble film up and out, forming a bubble.
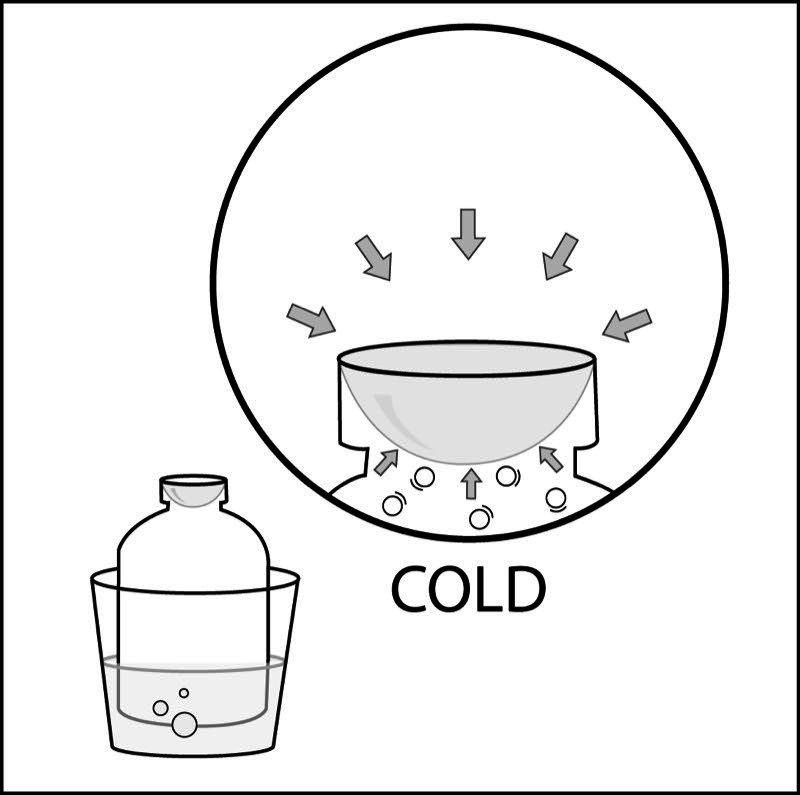
Cooling the gas makes the molecules move more slowly. These slower-moving molecules hit the inside of the bottle and the bubble film less often and with less force. The molecules in the surrounding air are moving faster and push against the bubble from the outside. Since these outside molecules are pushing harder, the bubble gets pushed down and gets smaller.
Step 7
Have students answer the questions about the growing and shrinking bubble on the activity sheet.
Give students time to complete the following questions. They should refer to the drawing included on the next page and on the activity sheet.
Once they have answered the questions, discuss their explanations as a whole group.
- What caused the bubble to form when you placed the bottle in hot water? Be sure to write about the speed of the molecules inside the bottle and the pressure from the outside air.
Point out that the molecules of air inside the bottle move faster when they are heated and push harder against the outside air. This makes the bubble form.
- Why did the bubble get smaller when you placed the bottle in cold water? Be sure to write about the speed of the molecules inside the bottle and the pressure from the outside air.
When the air inside the bottle is cooled, the molecules move slower and do not push as hard against the outside air. The outside air pushes against the bubble, making it go down.
Read more about the contraction and expansion of gases in Teacher Background.
- Teacher Background PDF
Step 8
Have students compare the molecules in solids, liquids, and gases.
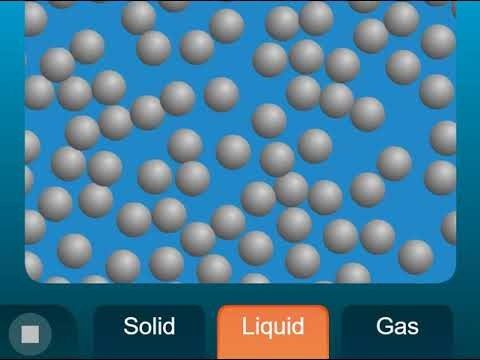
Show the molecular model animation Comparing Solids, Liquids, and Gases
Be sure students realize that the molecules shown are from three different substances all at room temperature. The solid is not melting to become a liquid and the liquid is not evaporating to become a gas. The model is not trying to show state changes but instead show three different substances (such as metal, water, and air), which are solid, liquid, and gas at room temperature.
Explain the following differences to students:
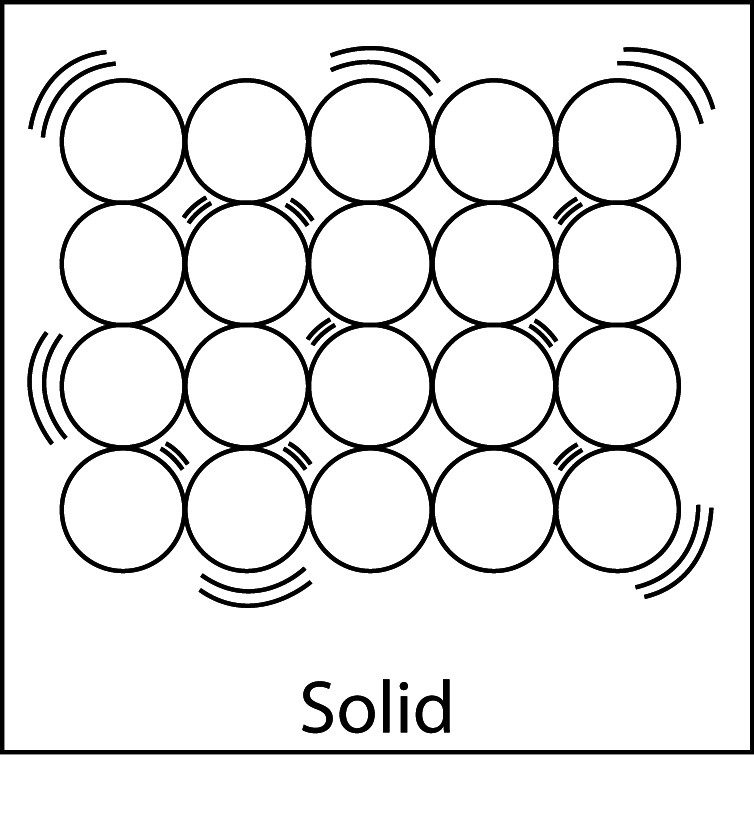
- Solid—Particles (atoms or molecules) are very attracted to one another. They vibrate but do not move past one another. The atoms or molecules stay in fixed positions because of their strong attractions for one another. A solid has a definite volume and a definite shape.
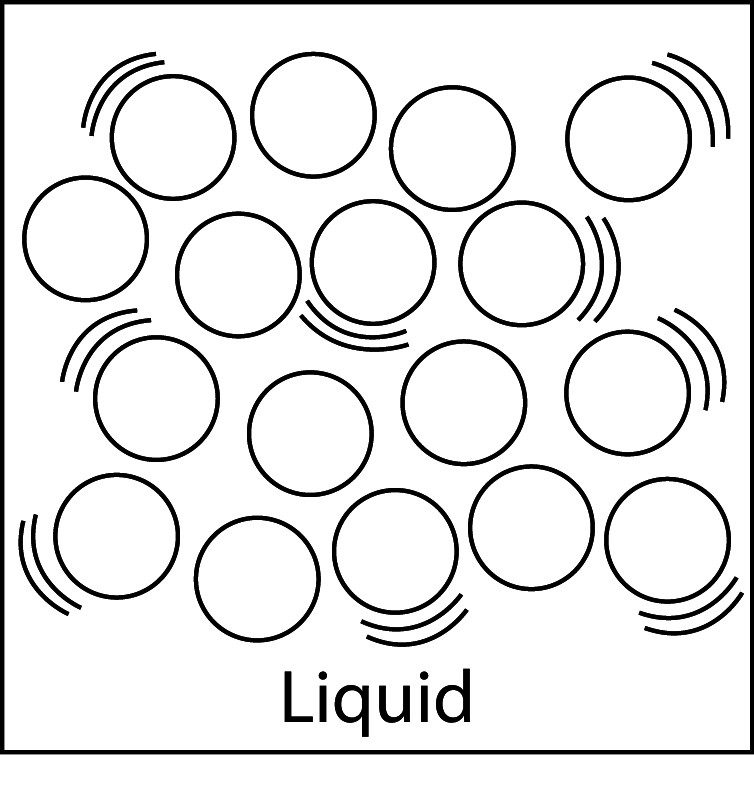
- Liquid—Particles (atoms or molecules) are attracted to one another. They vibrate but are also able to move past one another. A liquid has a definite volume but does not have a definite shape.
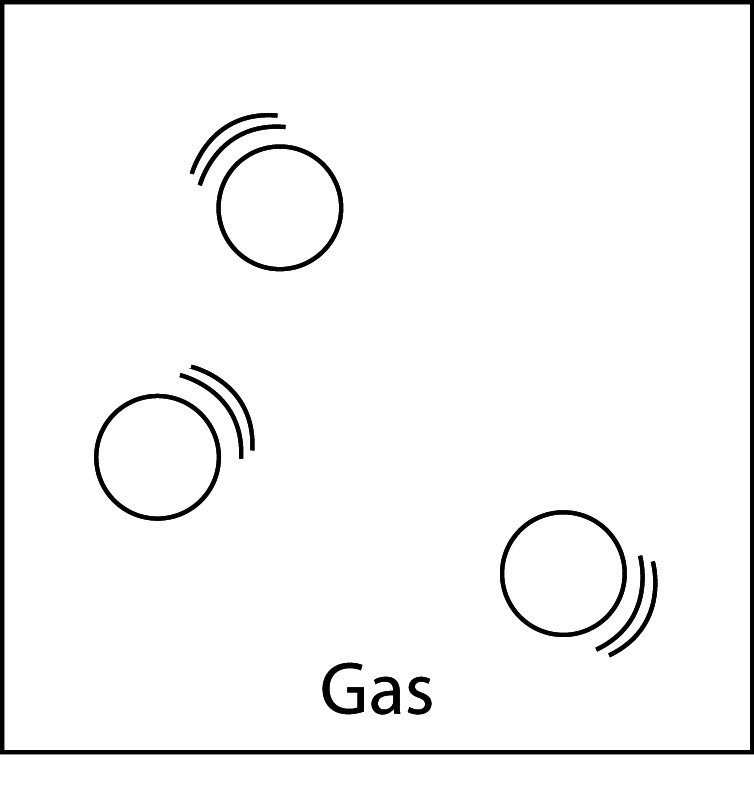
- Gas—Particles (atoms or molecules) are not attracted to each other much at all and move freely. A gas does not have a definite shape or volume. The atoms or molecules of a gas will spread out evenly to fill any container.
You could use the following example to help students appreciate how far apart the molecules of a gas are compared to the molecules in a liquid or solid:
- The molecules that make up a gas are about 100 to 1000 times further apart than the molecules of a solid or liquid. Imagine what a tablespoon of water looks like. If that same number of molecules was a gas, they would be spread out enough to fill up a whole beach ball. At room-temperature they are moving at about 1000 miles per hour, but over very short distances.
Draw or project the illustration Solid, Liquid, and Gas.
Have students use the projected illustration as a reference as they draw a model of solids, liquids, and gases on their activity sheet. Point out that the number of motion lines is the same for the solid, the liquid, and the gas. This indicates that the different substances are at the same temperature. Have students write captions like those listed below to describe the molecules in solids, liquids, and gases.
5 Extend
Step 9
Have students apply what they have learned to explain why a balloon grows when it is heated.
Tell students to consider the following scenario:
Imagine that you work at a party store during the summer. You are going to ride home with the owner of the store whose car has been sitting in the hot sun all day long. The owner tells you that you can take home a big bunch of balloons but advises you to not blow the balloons up all of the way. Knowing what you do about heating the molecules of a gas, explain why the owner’s advice is wise.
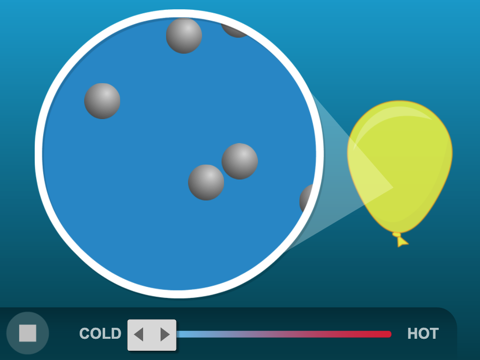
You may choose to show the animation Heating Molecules of a Gas if you would like to give students a hint.
What is the 5-E format?
The 5-E instructional model is an approach to teaching and learning that focuses on active engagement, inquiry-based learning, and collaboration.
Simulations
Downloads
For Students
- Lesson 1.5 Student Activity Sheet PDF | DOCX | Google Doc
For Teachers
- Lesson 1.5 Lesson Plan PDF | DOCX | Google Doc
- Lesson 1.5 Activity Sheet Answers PDF | DOCX | Google Doc
- Teacher Background PDF
Resources for the entire Chapter 1
- Chapter 1 Student Reading PDF | DOCX | Google Doc
- Chapter 1 Test Bank PDF | DOCX | Google Doc
Interactive Lesson Modules
- Lesson 1.5 Online Assignments Google Form
Have Questions? Visit Help Center

